Fear of circular patterns
Triggers, Symptoms, Diagnosis, and Treatment
Written by Stephanie Watson
In this Article
- What Is Trypophobia?
- Is Trypophobia a Real Phobia?
- Trypophobia Symptoms
- Trypophobia Triggers
- Trypophobia Causes
- Trypophobia Risk Factors
- Trypophobia Diagnosis
- Trypophobia Treatment
- Trypophobia Outlook
What Is Trypophobia?
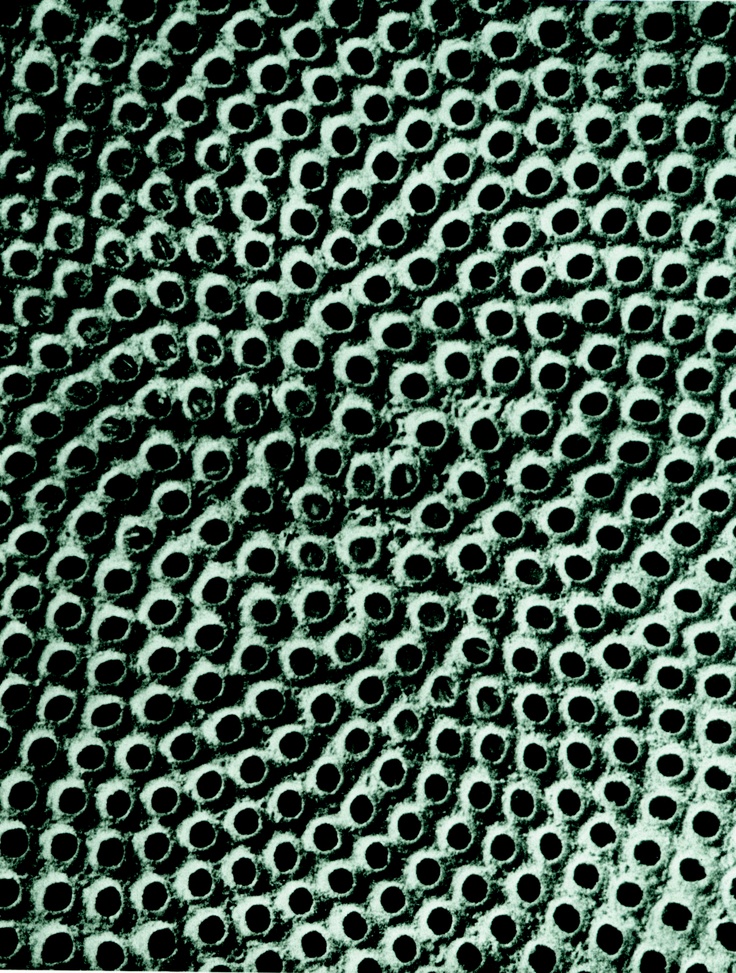
Does the sight of a honeycomb, sea sponges, or soap bubbles make you shaky and sick to your stomach? You could have trypophobia, a fear of holes.
The name for this problem comes from the Greek words "trypta," which means hole, and "phobos," which means fear. But the term doesn't date back to ancient Greece. "Trypophobia" reportedly first appeared on a web forum in 2005.
It's one of many fears of harmless things, like chaetophobia, a fear of hair, or microphobia, a fear of small things.
People with trypophobia have a strong physical and emotional reaction whenever they see patterns made up of holes or spots. The bigger the cluster of circles, the more uncomfortable they feel.
Is Trypophobia a Real Phobia?
True phobias are those that cause enough fear and worry to interfere with your everyday routine, according to the American Psychiatric Association (APA). Trypophobia doesn't meet that standard.
The APA doesn’t officially recognize this disorder in its Diagnostic and Statistical Manual of Mental Disorders, 5th edition (DSM-5), a large volume of all known mental illnesses and their symptoms. Experts say trypophobia is more likely disgust than fear.
Trypophobia Symptoms
The symptoms of trypophobia look a lot like a panic attack. You might have:
- Nausea
- Shaking
- Shortness of breath
- A fast heartbeat
- Sweating
- Itching, goosebumps, or a feeling like your skin is crawling
People with trypophobia may get these symptoms several times a week or every day. Sometimes, the fear of holes never goes away.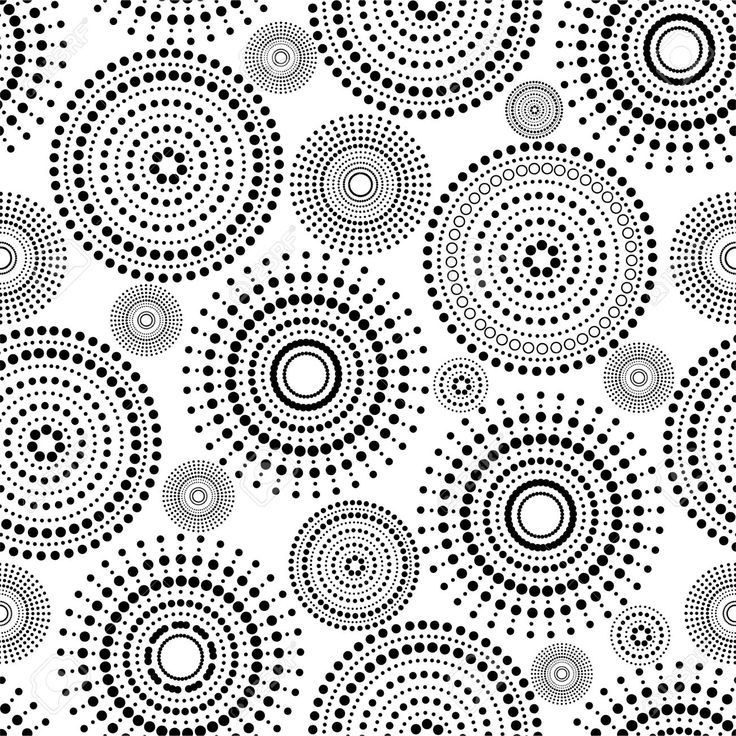
Trypophobia Triggers
Common things that can trigger trypophobia include:
- Holes or pebbles in concrete
- Air holes in a slice of bread
- Patterns in the frosting of a cake or pie
- The head of a lotus flower
- The holes in an old hockey mask
- Skin problems like sores, scars, and spots
- Spotted animals
- Shower heads
- LEDs in traffic lights
Trypophobia Causes
Researchers have a few ideas about what causes trypophobia.
The powerful reaction might be a way to protect yourself from danger. Some of the most poisonous animals on the planet -- like the king cobra, puffer fish, and poison dart frog -- have hole-like patterns on their skin. Those patterns are like the ones that bother people who have trypophobia.
Deadly diseases such as measles and smallpox cause circular skin rashes. Trypophobia could be a reaction that humans have developed to avoid getting sick.
It's also possible that the images themselves trigger fear. Some people may be more sensitive to the mix of light and dark in pictures of holes. Researchers say that hole-like patterns have a type of visual energy that can cause an unpleasant reaction.
Other researchers believe that the fear comes from social anxiety. Circles look a little bit like clusters of eyes or faces staring at you, which can be upsetting if you get nervous in social settings.
Trypophobia Risk Factors
Trypophobia is more common in women than in men. It also runs in families. In one study, about 25% of people who had trypophobia also had a close relative with the condition.
Some people who are afraid of hole patterns also have other mental disorders, such as:
- Major depression
- Generalized anxiety disorder (GAD)
- Social anxiety
- Panic disorder
- Obsessive-compulsive disorder (OCD)
- Bipolar disorder
Trypophobia Diagnosis
Doctors don't know a lot about trypophobia, and it can be hard to diagnose.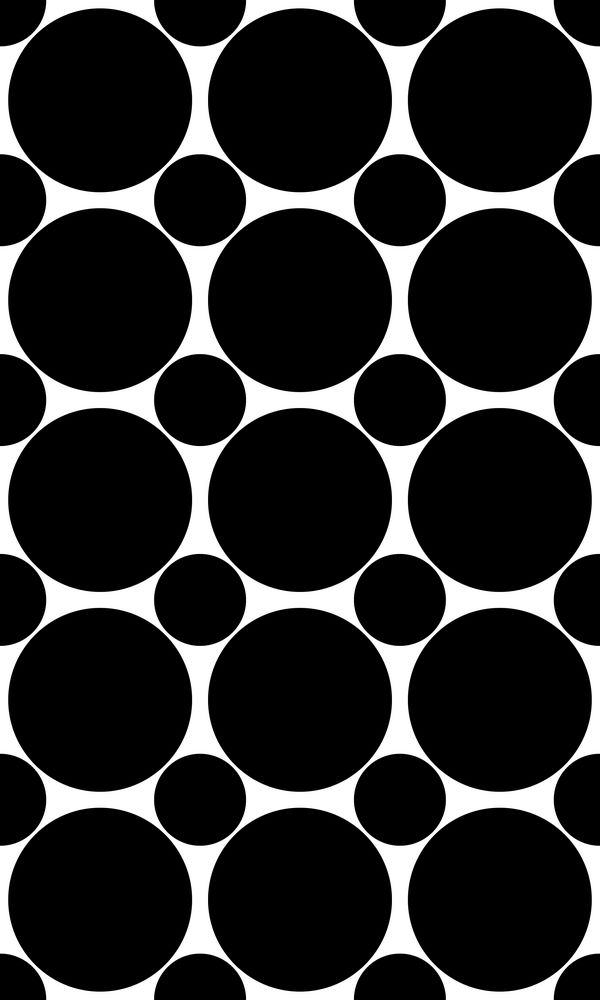 A psychologist or primary care doctor will ask about your symptoms and how they affect your everyday life.
One group of researchers created a list of 17 questions called the trypophobia questionnaire. It asks people to rate symptoms like anxiety or fear on a scale from 1 ("Not at all") to 5 ("Extremely") when they see pictures of holes.
A few self-tests are available online, including the Implicit Trypophobia Measure 0.5a. Before you click on one of these tests, remember that they could include images that are disturbing, even to people who don't have trypophobia.
Trypophobia Treatment
Because trypophobia isn't a true disorder, there’s no set treatment for it. Some studies show that an antidepressant like sertraline (Zoloft) plus a type of talk therapy called cognitive behavioral therapy (CBT) are helpful. CBT tries to change the negative ideas that cause fear or stress.
Trypophobia Outlook
If circular patterns bother you, it can help to talk with other people who share your fear. They might have some suggestions for ways you can manage trypophobia. Ask your doctor, or look online for support groups.
Triggers, Causes, Treatment, and More
Trypophobia refers to a strong fear or disgust of closely packed holes. The name, first introduced on a web forum in 2005, combines the Greek words “trypa” (punching or drilling holes) and “phobia” (fear or aversion).
People who have this phobia typically feel queasy, disgusted, and distressed when looking at surfaces that have small holes gathered close together or clustered into a pattern.
Experts don’t yet officially recognize trypophobia as a specific phobia. Studies exploring this phobia remain limited, and existing research hasn’t reached a conclusion on whether to consider trypophobia a unique mental health condition.
That said, there are plenty of anecdotal reports of people experiencing trypophobia.
Read on to learn more about the fear of holes, including potential triggers, causes, and how to get support when it causes extreme distress.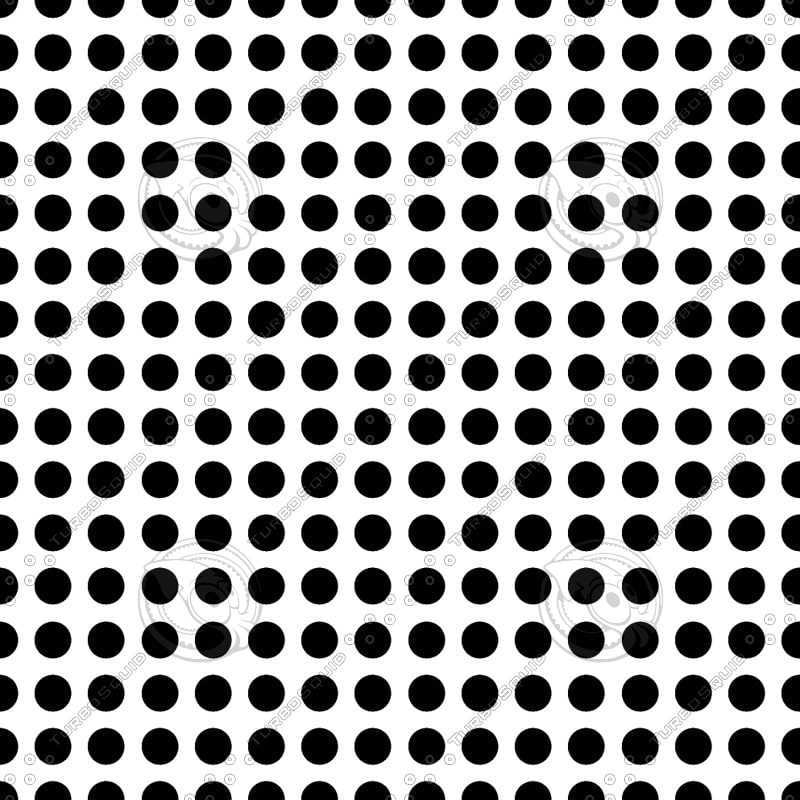
Trypophobia is mainly visual. If you have this phobia, you might feel anxiety, disgust, and discomfort when looking at things like:
- lotus seed pods
- honeycombs
- strawberries
- coral
- seeded breads
- Swiss cheese
- scabs or lesions on skin
- aluminum metal foam
- pomegranates
- sponges
- pebbled or graveled roads
- bubbles
- condensation
- cantaloupe
- a cluster of eyes
Animals with spotted skin or fur — think leopards, Dalmatians, or poison dart frogs — can also prompt revulsion and fear.
Some people with a fear of holes have an aversion to surfaces with irregularly shaped holes only. They may not notice the same level of discomfort when looking at surfaces with holes of the same size, like those in a showerhead or on a fabric patterned with polka dots.
Others might find all closely packed holes uncomfortable and upsetting.
Pictures of trypophobia triggers
If you have trypophobia, you’ll generally notice feelings of disgust and discomfort when looking at an object or surface with small clusters of holes or shapes that resemble holes.
While you might associate phobias with fear, research from 2018 suggests most people with trypophobia experience disgust — not fear — as a primary symptom.
You might also begin to feel disgusted, uncomfortable, or anxious when thinking about something that has this appearance — if, say, your partner begins to tell you how much they love strawberries and you start to visualize the fruit.
Specific symptoms might include:
- goosebumps, chills, or the sensation of your skin crawling
- gagging or nausea
- sweating
- rapid heartbeat
- dizziness or lightheadness
- visual discomfort, including eye strain, distortions, or illusions
- a general sense of discomfort or distress
- a strong desire to get away from the image or object
- feelings of panic or a panic attack
- shaking or trembling
Scientific evidence has yet to pinpoint a clear cause of trypophobia, but there are a few potential explanations.
Some experts theorize this fear of closely-packed holes may develop as an extension of a biological fear of venomous or otherwise dangerous creatures.
Researchers who analyzed images that produced an anxiety response in people with trypophobia found that high contrast colors in a certain graphic arrangement tended to trigger anxiety, disgust, and other symptoms.
They also found that images of certain highly dangerous animals, including the king cobra, deathstalker scorpion, and blue-ringed octopus, shared certain spectral properties with the trypophobic images. Spectral properties refer to subtle things, like contrast and spatial frequency, that can impact how your eyes and brain take in images.
The fear of holes, then, may be less a fear of holes and more an unconscious association of harmless items (like lotus seed pods) with feared animals (like a blue-ringed octopus) because they share certain spectral features.
In other words, trypophobia may stem from your evolved ability to detect threats in your environment.
Many people with trypophobia also experience a strong aversion to scabs, pockmarks, or other patterns of rashes and skin markings, leading some experts to link this phobia to another evolutionary response: the drive to avoid germs or contagious skin conditions or illnesses.
Other experts aren’t so sure
In one 2017 study involving 94 preschoolers, who typically don’t have the same fear of snakes and spiders as older children and adults, researchers showed 4-year-olds several sets of images:
- trypophobic images featuring small holes
- images and line drawings of venomous animals
- images and line drawings of nonvenomous animals
According to the results, children who experienced distress when looking at trypophobic images also experienced distress when looking at color images of venomous animals — but not when looking at the line drawings of the same animals.
Study authors believe these results support the idea that trypophobia relates only to the unique spectral characteristics shared by certain animals and clusters or patterns of holes, rather than an unconscious fear of dangerous creatures. They do, however, note the need for more research exploring the fear of holes.
Again, research on trypophobia remains in the early stages, so experts aren’t yet certain exactly what factors can increase your chances of developing a fear of holes.
That said, it’s not uncommon for a phobia to begin after an unpleasant or distressing event with the object of the phobia.
Based on the potential causes of trypophobia, it’s possible your aversion could begin after an encounter with a venomous snake, exposure to a contagious skin condition, or another trypophobia trigger.
One 2017 study found a possible link between trypophobia and major depressive disorder and generalized anxiety disorder (GAD). Study authors surveyed 195 adult members of a trypophobia support group and found that:
- 19 percent of participants had a diagnosis of major depression, and an additional 8.7 percent believed they could have major depression
- 17.4 percent of participants had a diagnosis of generalized anxiety disorder, while an additional 11.8 percent believed they could have GAD
- Many participants reported other mental health diagnoses, including social anxiety (8.2 percent) and panic disorder (6.2 percent)
Research from 2016 also noted a link between social anxiety and trypophobia, suggesting that for people with social anxiety, the fear of holes could in fact be a fear of eyes, or the human gaze. Seeing clusters of holes might provoke the sensation of many pairs of eyes gazing back at you, leading to distress and discomfort.
You also have a higher chance of developing any phobia if you have a family history of anxiety conditions and phobias in particular.
Only mental health professionals can diagnose phobias, like a fear of holes. Since there’s no official diagnosis of trypophobia, a therapist won’t diagnose trypophobia specifically.
All the same, they can certainly recognize when the appearance of clustered holes causes intense distress and offer guidance and support on working through that fear. They may offer a more general diagnosis of specific phobia.
Plus, a therapist can also help identify any other mental health symptoms you live with, including signs of anxiety conditions or depression, by asking questions about:
- the symptoms you experience
- the things that trigger them
- how they affect your daily life
Learn more about what therapy involves.
Support from a mental health professional can go a long way toward helping ease symptoms of trypophobia.
Potential approaches to treatment might include:
Therapy
A few different types of therapy can help treat phobias, including exposure therapy and cognitive behavioral therapy (CBT):
- Exposure therapy. This approach allows you to begin facing your fear in the safe environment of therapy so you can learn — with a therapist’s support — to change your response to the object or situation causing your fear. Experts generally consider exposure therapy the most effective approach for phobias.
- CBT. This approach teaches strategies to help identify, challenge, and reframe unwanted thoughts and distressing feelings. CBT techniques can help you learn to manage overwhelming emotions, including feelings of anxiety and fear.
Learn more about therapy for phobias and when to reach out.
Medication
No medication specifically treats trypophobia symptoms, but a psychiatrist or other prescribing clinician might recommend medication if you experience:
- extreme feelings of anxiety or panic in certain situations
- anxiety overwhelming enough to get in the way of everyday life or keep you from making progress in therapy
- symptoms that don’t improve with therapy alone
Medication options for specific phobias might include:
- benzodiazepines
- beta-blockers
- antidepressants
- buspirone
Learn more about medication for anxiety.
Other approaches
Your therapist might also recommend other strategies to help you manage anxiety and emotional distress. These might include:
- relaxation techniques, including deep breathing, yoga, and meditation
- spending time in nature and other calming environments
- mindful breathing, observation, listening, and other mindfulness tricks to help cope with stress
- taking time for hobbies and enjoyable activities
While taking care of your physical health may not address your phobia directly, good self-care can go a long way toward helping you feel more able to manage anxiety and other symptoms.
A few tips that may help:
- Aim to get around 7 to 8 hours of sleep each night.
- Eat a balanced diet and limit foods that can trigger anxiety.
- Get regular physical activity, if you’re able — exercise can help ease anxiety and depression symptoms.
- Limit caffeine, especially if you’re sensitive to its effects, since it could worsen anxiety symptoms.
- Reach out to friends and family to talk through your feelings.
- Find a support group to connect with other people living with the same symptoms.
Here’s how to create a personalized self-care checklist.
In search of a therapist?
If you’d like to try online therapy, our review of the best online therapy options can help you start your search for the right teletherapy service for your needs.
Experts may not yet recognize the fear of holes as an official phobia, but that doesn’t mean your symptoms aren’t real.
If your symptoms cause emotional distress and affect your daily life, talking with a mental health professional is a good next step. They can help you explore possible causes, triggers, and helpful strategies to manage anxiety, disgust, and other unwanted emotions related to trypophobia.
Garter stitch - the easiest pattern to make
The very name of this simple pattern speaks of its main purpose - garter stitch is used for knitting scarves. But the excellent quality characteristics of the fabric knitted with such a viscous make it possible to use it to create a wide variety of clothing models for adults and children.
In appearance, garter stitch on knitting needles is very similar to the wrong side, but it has a looser structure, tends to increase the size of the knitted fabric in width and shorten its length somewhat. In addition, the knitting is two-sided, i.e. The front and back sides of the knitted fabric look identical. nine0003
It should be reminded once again that garter stitching is done with flat knitting needles. When knitting the fabric with facial loops on stocking or circular knitting needles, you get a stocking surface. As for the knitting technology, it is one of the simplest; even knitters with no experience can use it to make products. To get a positive result, you only need to master the technique of tying loops and learn how to knit one type of loops. Garter stitch is knitted either with facial loops in each front and back row, or with back loops. Knit the front loops should be the first way. nine0003
The use of different types of loops will result in a slightly different quality of the fabric: when using wrong loops, the fabric will be more voluminous, but more loose.
What are the advantages of garter stitch
Garter stitch is characterized by the formation of a strong, non-twist edge. This made knitting very popular for knitting collars, plackets, waistbands and cuffs. Knitting has become especially relevant today, when knitted products without traditional elastic at the bottom are in fashion. The fabric knitted with a garter stitch is not prone to deformation during washing, it retains its original shape and dimensions well. nine0003
Garter stitch is ideal when creating products from textured, irregular yarns. Such knitting favorably emphasizes the beauty of the thread itself. Even the most inexperienced knitter, who managed to master one type of loop, can easily create an interesting model.
Another nice feature that garter stitch has is the ease of knitting a striped product. Very interesting models are obtained by alternating rows connected with threads of different colors. You can change the color after any even number of rows, if desired. The canvas knitted in this way looks quite attractive, and its wrong side and front side have a different look. nine0003
Where garter stitch is used
Garter stitch is used for knitting men's and women's sweaters, vests and jackets, coats, children's suits, scarves, scarves, hats. This type of knitting is perfectly combined in one product with braids, plaits. Garter stitch in this case is used as a background pattern. For dividing the plane between the background pattern and finishing stripes, braids or plaits, the wrong side of the stocking surface is used. When knitting summer products from thin threads, garter stitch can be quite interestingly combined with openwork finishing stripes. nine0003
Knitted toe socks
Author Marina To read 13 min Views 6k. Posted by Updated
For those who are used to the classic way of knitting socks from the top down, knitting socks from the toe with knitting needles seems to be an incredibly difficult task.
In fact, toe socks are quite easy to knit. For those who doubt the correctness of my words, I want to offer a simple, proven method from personal experience. nine0003
I think that after studying it, you will acquire all the necessary skills for knitting socks from the toe.
Contents
- Why you should learn to knit socks from the toe with knitting needles
- Tools and materials for knitting
- How to take measurements for knitting socks from the toe
- How to make calculations for knitting socks from the toe
- How to start knitting socks from we
- Knitting the toe
- How to knit the heel of the sock
- Shaping the heel cup
- How to connect the loops of the cups
- How to knit a wedge of lifting of the foot and a lower leg
- Formation of the clin of lifting of the foot
- Conclusion
Why learning to knit socks from the mouse with knitting needles
can teach you induce quite banal reasons.
The main motive for learning this simple knitting method is the fear that the yarn may not be enough to knit a second sock, and all work will have to start over. nine0003
Knitting two socks at the same time using the “magic loop” method using circular needles on a long fishing line can greatly simplify the task. Experienced knitters have calculated that knitting 2 socks together noticeably speeds up work, which is why many experienced needlewomen prefer this method.
For those who are not familiar with the magic loop method, I advise you to first study the detailed article on our website “1000 knitting ideas”: The magic loop method is the easiest and fastest knitting in a circle. nine0003
In addition, toe socks can be finished exactly at the moment when the last meter of yarn is finished. Therefore, the method of knitting from the toe will help solve another important problem that is relevant for almost all knitters. From this moment on, you will forever cease to be tormented by the issue of eliminating the remnants of yarn.
Knitted toe socks are the most comfortable to wear as they are great for high insteps and problematic feet.
If I managed to convince you that it is worth learning how to knit socks starting from the toe, then continue reading the article. If you still have fears, then you are not yet ready to learn this simple method.
I promise to all those who doubt that it will not be difficult at all, you just need to follow the suggested guide. How to knit classic socks on 5 knitting needles can be found in the article "Socks with a reinforced heel".
Knitting tools and materials
To knit socks from the toe we need:
- Any sock yarn. I used Adelia Jake yarn. Yarn parameters: 400m/100g. Composition: 75% wool, 25% nylon. Any contrasting yarn with similar characteristics can be used to knit the heel, toe and ribbing.
- Circular needles No. 3, connected to each other with a fishing line 80 cm long.
- Hosiery needles No. 3 for knitting the cup of the heel.
- Pins. nine0039 Gypsy needle.
How to take measurements for knitting socks from the toe
The sequence of measurements for knitting socks from the toe is no different from the sequence of measurements for knitting socks in the classical way.
If you are knitting for yourself, measurements are not required. It is enough to take a ready-made knitted sock that fits you, and then just measure all its parameters. If you make a mistake, then it will not cause much problems. nine0003
The fact that your foot is always with you will allow you to make an unlimited number of fittings during work and make corrections in a timely manner. Moreover, trying on socks that are knitted from a toe on knitting needles with a long fishing line is very simple. For convenience, simply move the sock to the flexible connection.
In the event that you are going to knit socks for another person, it is better to take measurements. It's no secret that correctly carried out measurements will help to avoid annoying mistakes and dressings. nine0003
In order to knit socks of the required size, you need to take 5 basic measurements:
- Foot length. In order to measure the length of the foot, you need to put your foot on a blank sheet of paper and circle it with a pencil or pen. In this case, the pencil should be as close to the foot as possible. Foot length is measured from the middle of the heel to the base of the big toe.
- Foot length to the base of the big toe. In this place, as a rule, the knitting of the toe ends.
- The circumference of the leg at the ankle. Measured just above the bone. This measurement is usually used for non-standard legs. For a too full ankle, the number of loops for knitting the lower leg must be increased. For too thin, on the contrary, reduce.
- The instep circumference is measured from the middle of the foot. For too high a rise, the height of the heel increases.
- The circumference of the foot at the base of the little toe.
How to make calculations for knitting socks from toe
Before you start knitting socks from the toe with knitting needles, you need to perform calculations, knit a sample and determine the density of knitting. The sequence of knitting a sample is described in detail in the article on our site “1000 ideas for knitting with knitting needles”: Knitting a sample with knitting needles - detailed instructions for beginners.
The finished sample allows you to correctly determine the density of knitting and correctly perform all the necessary calculations.
At the classic beginning of knitting socks from top to bottom, the question arises: “How many loops to cast on for knitting socks?”. When knitting socks from the toe, an arbitrary number of loops is typed. Most often, 8-16 loops are cast on the upper and lower knitting needles. Then the number of loops is increased until the width of the sock reaches the measurement of "girth of the circumference of the foot at the base of the little toe". nine0003
In order to determine how much to increase the number of loops, you need to multiply the circumference of the foot at the base of the little toe by the knitting density.
It is no secret that knitted fabric is very elastic and stretches well. In order for the sock to sit tight on the leg, an adjustment is made for the tightness of the fit, for this the number of loops is reduced by 5%–10% depending on the size of the leg.
When knitting the sample, I got a density of 30 p. * 10 cm. So for the girth of the circumference of the foot at the base of the little finger in 22 cm, you need to dial 60 loops:
60 sts = (30 sts * 22 cm) / 10 sts * 90%
How to calculate the number of rows for knitting the foot, I will explain as I describe the work.
How to start knitting socks from the toe with knitting needles
In order to start knitting socks from the toe with knitting needles, you can cast on loops in two ways. Both methods allow you to make a set for circular knitting on two parallel knitting needles.
Each of the methods is described in detail on our site "1000 ideas for knitting". You can check them out by following the links below:0003
- Magic loop set by Judy Becker. I also recommend watching the video of the channel "School of knitting - Our yarn - with Katerina Mushin"
https://www.youtube.com/watch?v=e_N2ht08VWw
- Cast on with scrap yarn. If you decide to cast on with an additional thread, then it will need to be removed immediately after the 1st row is knitted.
With any type of cast-on, exactly half of the stitches must be on each needle. To start knitting, we need 24 loops. Therefore, on each knitting needle you need to dial 12 loops. nine0003
To knit socks from the toe, an even number of stitches are cast on each needle. In this case, the total number of loops of the sock should be divisible by 4.

Since we will knit two socks at the same time, the set of loops must be made with yarn from different balls.
First cast on for the first sock from the first ball, and then for the second sock from the second ball. If the set of loops is done correctly, then the beginning of knitting will look like this.
On the front side, the cast on loops will be smooth, and on the wrong side, tubercles characteristic of the wrong loops will form.
Knitting a toe
It is customary to start knitting a toe from the right toe on the underside of the foot.
Before knitting, pull the lower needle to the right by about half the length of the line. An elongated knitting needle will be considered a working one. Then knit with a working knitting needle from the 1st ball the loops cast on for the right toe, from the 2nd ball - the loops of the left toe. nine0003
After the last stitch of the left sock has been worked, turn the work. Then, with the reverse movement of the hand from right to left, return the elongated knitting needle to the beginning of knitting. Pull the needle from the side of the knitted bottom of the sock. Knit with an elongated knitting needle from the 2nd ball of the loop of the left sock, from the 1st ball of the loop of the right toe. After that, the 1st circular row will be fully knitted.
Starting from the second row in each even row, we will add loops. To do this, from the loops at the beginning and end of each knitting needle we will knit 2 loops for the back and front wall. Therefore, in every 2nd row, one sock will increase by 4 loops. nine0003
Row 1: Right toe - 12 sts Left sock - 12 l.p. We expand the work. Left sock - 12 l.p. Right sock - 12 l.p.
2nd row: Right sock - from 1 st. knit 2 sts, knitting the original loop first for the front and then for the back wall. 10 l.p. From 1 l.p. tie 2 sts, knitting it first for the front, and then for the back wall.
Left sock - from 1 sheet tie 2 sts, knitting it first for the front, and then for the back wall. 10 l.p. From 1 l.p. tie 2 sts, knitting it first for the front, and then for the back wall. nine0003
Expand the work, repeat first for the left and then for the right toe.
We continue to knit in this way until the number of loops necessary for knitting the foot is added. In order for the width of the sock to increase to 60 loops, we need to knit 18 rows.
If done correctly, the finished toe will look like this.
How to knit the heel of a sock
After the toe is tied, you can start knitting the foot. The foot is knitted in a circle without changing the number of loops, so I don’t see the point in describing the process of doing the work in detail. nine0003
When the length of the toe reaches approximately 65% of the total length of the foot, you can start knitting the heel.
Therefore, for a foot length of 26 cm, you need to knit 17 cm from the beginning of the toe:
26 cm x 0. 65 = 17 cm.
Everyone must perform these simple calculations for their toe length.
For the heel we will use 2/3 sts of the sole, because for the sock I used 60 sts, 30 sts for the sole and 30 sts for the upper side of the sock. Therefore, I will knit the heel on 20 central loops:
30 sts x 2/3 = 20 sts.
The heel is always worked on an even number of stitches. Therefore, if you get an odd number, then you need to round it up or down.
The remaining first and last 5 sts of the sock must be slipped onto a waste thread or onto a pin.
Then work in the middle 20 sts in turning rows until the toe and heel measures approx. 90-95% of the total length of the foot. Knitting the heel must be finished with the right (front) row. nine0003
26 cm x 0.95 = 25 cm.
Forming the heel cup
Now you can begin to form the heel cup. For convenience, we will knit cup loops for each sock separately. At this stage, we will use stocking knitting needles. On stocking needles or a special pin for knitting, you need to remove the upper part of the sock. This will make knitting easier.
Heel cup is worked in short rows, starting from a wrong side row. The work ends with the front row. nine0003
Each row will be reduced by 2 stitches. Due to the fact that the last 2 loops of the row will remain untied on the left knitting needle. After that, the sock will turn, and the next row will begin with the last knitted loop of the previous row.
Continue in this way until 8 stitches remain in the center of the work.
1 row: slip 1 out. p., 17 out. n. Without tying 2 sts to the end of the row, expand the work.
2nd row: remove 1 l. p., 15 l. n. Without tying 2 sts to the end of the row, expand the work.
3rd row: slip 1 out. p., 13 out. n. Without tying 4 sts to the end of the row, expand the work.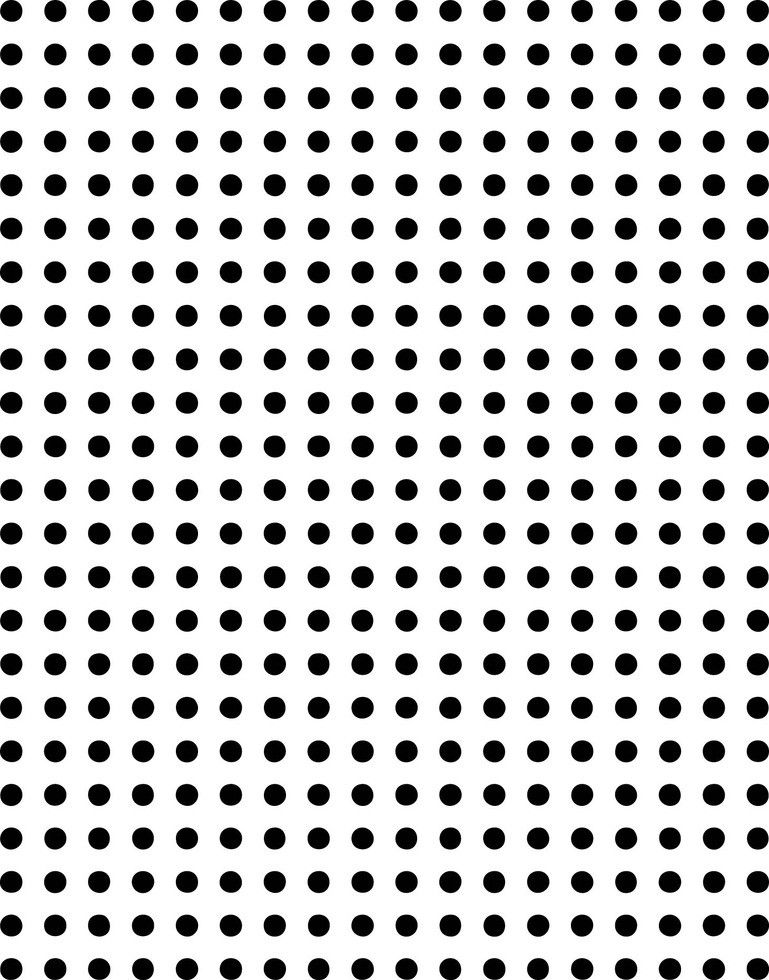
4th row: remove 1 l. p., 11 l. n. Without tying 4 sts to the end of the row, expand the work.
Row 5: slip 1 out. p., 9 out. n. Without tying 6 sts to the end of the row, turn the work.
6 row: remove 1 l. p., 7 l. n. Without tying 6 sts to the end of the row, turn the work.
How to join the cup loops
Now we need to join the cup loops. The connection starts on the wrong side and ends on the front side of the heel.
Row 1: purl 8. p., 2 loops together purl. There should be 9 loops in total. Return work.
Row 2: K9, K2 together. There should be 10 loops in total. Return work. nine0003
Row 3 : K 10 purl. p., 2 loops together out. There should be 11 loops in total. Return work.
4th row: K11, K2 together. There should be 12 loops in total. Return work.
Row 5: purl 12. p., 2 loops together out. There should be 13 loops in total. Return work.
6th row: K13, K2 together. There should be 14 loops in total.
In the same way we knit a cup for the second sock. nine0003
How to Knit Instep Wedge and Shaft
Instep Wedge and Shaft are knitted for two socks at the same time using the magic loop method.
For knitting, we remove, set aside on an additional knitting needle or pin, the loops of the upper part of the foot of the right sock on knitting needles with a long fishing line.
To form the lower part of the foot, move the upper part of the sock to the middle of the fishing line. We remove 5 right delayed loops of the lower part of the foot from the waste thread to the working knitting needle. nine0003
Pick up one st from the previous row in the gap between the discarded sts and the wall of the heel. Then we collect 10 loops along the edges of the heel wall. Raise one more loop from the previous row in the gap between the wall and the heel cup. There should be 12 additional loops in total.
Slip 14 heel cup sts onto the working needle.
Using a stocking needle, pick up 12 stitches on the left side of the heel, and then knit them with a working needle. Thus, the loops cast on the left side of the heel become the beginning of the row. nine0003
We transfer 5 left stitches from the waste yarn to the working knitting needle, we knit them with the working knitting needle.
The loops for the right toe are now fully cast on. 30 loops should remain on the top of the sock. On the underside of the sock, you should get 48 loops (taking into account the added ones).
5 sts + 12 sts of the heel wall + 14 sts of the cup + 12 sts of the heel wall + 5 excellent sts = 48 sts
a long loop of fishing line should be stretched between the upper and lower sides of the sock. nine0003
In the same way we cast on the loops for the second toe.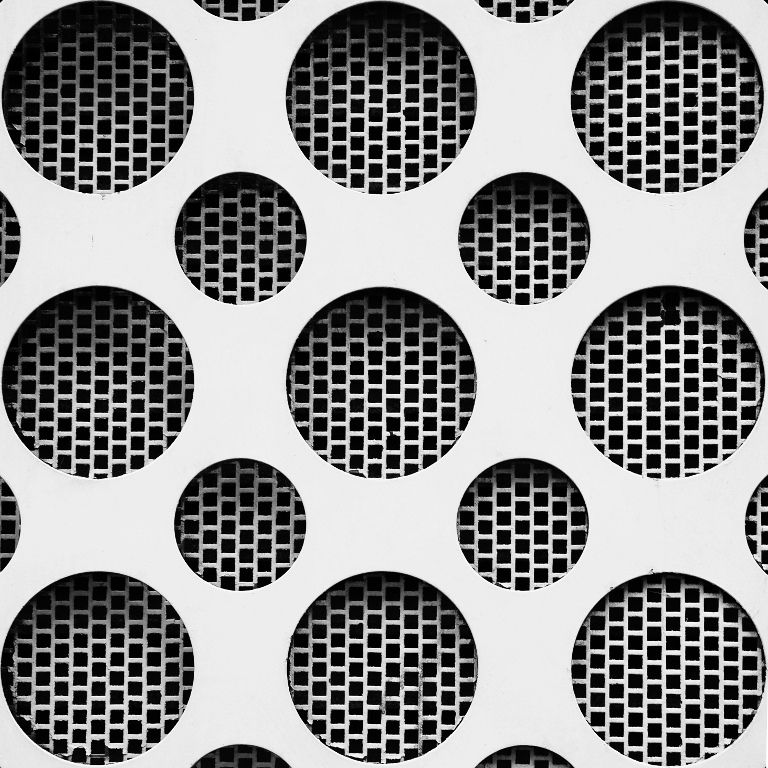 In this case, the loops of the upper part of the left sock should be on the same knitting needle with the upper loops of the left sock. The loops of the lower part of the left sock are on the same needle with the loops of the lower part of the right sock.
Shaping the instep wedge
After the sts on the sides of the heel are cast on and both socks are placed next to each other on circular needles, you can start forming the instep wedge. nine0003
In the 1st row, all loops are knitted without decreasing. Next, we will reduce the number of loops of the wedge until their number is reduced to the original number. 60 for each sock.
On every even row, knit the 1st st in the back of the sock. The next two loops are knitted together with the front one with an inclination to the left. Further, all the loops are knitted front, until there are three loops left on the left needle. The two penultimate loops are knitted together with the front loop with an inclination to the right, the last loop is knitted with the front loop.