Relieving shoulder tension
12 Stretches for Fast Relief and Tips for Prevention
We include products we think are useful for our readers. If you buy through links on this page, we may earn a small commission. Here’s our process.
Overview
Tight shoulders can cause pain or stiffness in your neck, back, and upper body, and limit your daily activities. Your shoulders may feel tight and stiff as the result of stress, tension, and overuse. Tight shoulders can be also caused by sitting for extended periods, incorrect sleeping positions, and injuries. Poor posture and improper alignment of your body can also play a part.
Read on to learn how to relieve and prevent tight shoulders.
It’s important that you stretch your shoulders regularly to loosen and strengthen the muscles. Releasing tension in your body can improve your overall feelings of wellness, too.
These stretches may help increase flexibility, extend your range of motion, and prevent injury. If you’re short on time, try to do them in shorter spurts throughout the day. You can increase the number of sets you do as you gain strength and mobility.
1. Shoulder raises
- While standing or sitting, and with your arms by your side and a straight back, slowly lift your shoulders up toward your ears.
- Hold here for a few seconds.
- Slowly lower your shoulders back down.
- Repeat 5 times.
2. Shoulder rolls
- Maintain good posture while standing or sitting.
- Roll your shoulders up, back, and down.
- Do this movement 10 times.
- Then, roll your shoulders up, forward, and down 10 times.
3. Ear to shoulder
- Sit with a straight spine and tilt your head toward your right shoulder.
- Go as far as you can without straining or lifting your left shoulder.
- Deepen the stretch by using your right hand to gently pull your head down.
- Hold for 30 seconds.
- Repeat on the opposite side.
4. Chin retraction
- Align your head, neck, and spine while standing or sitting.

- Extend your chin in front of you as far as it will go without straining.
- Then pull your chin back into your throat and neck.
- Repeat 10 times.
5. Cross arm stretch
- Bring your left arm across the front of your body at about chest height.
- Support your left arm with the elbow crease of your right arm or use your right hand to hold your left arm.
- Stretch out your shoulder and continue to face forward.
- Hold this stretch for 30 seconds.
- Repeat on the opposite side.
6. Standing arm swings
- Stand with your arms by your side and your palms facing your body.
- Swing your arms forward to bring your arms as high up as they will go without raising your shoulders.
- Lower your arms back down and bring them as far back as you can.
- Keep the rest of your body still.
- Continue this movement for 1 minute.
7. Standing arm lifts
- Make fists with your hands and bring them in front of your hips.
- Inhale as you lift your arms overhead so your hands come together above your head.
- Lower back down to the original position.
- Repeat 10 times.
8. Wide-legged standing forward bend
- Stand with your feet wider than hip distance with your toes facing forward.
- Interlace your hands behind your back and open your chest.
- Engage your leg muscles and keep a slight bend in your knees.
- Hinge at the hips to fold forward, bringing your arms over your head toward the floor.
- Allow your head to hang down and tuck your chin in slightly to your chest.
- Remain in this pose for up to 1 minute.
9. Cat cow pose
- Place your hands underneath your shoulders and your knees underneath your hips.
- On an inhale, fill your belly with air and let it sink down as you look up.
- Exhale as you engage your abdominals, tuck your chin into your chest, and round your spine.
- Continue this movement for a few minutes, paying special attention to your shoulders.

10. Thread the needle
- Come onto your all fours with your hands directly under your shoulders and your knees underneath your hips.
- Lift your right hand and slowly bring it over to the left with your palm facing up.
- Rest your body on your right shoulder and turn your head to face to the left.
- Make sure you’re not sinking onto your shoulder.
- Hold this pose for 30 seconds.
- Slowly release and come back to the original position.
- Repeat on the opposite side.
11. Reverse prayer pose
- You can do this pose while seated, standing, or in tree pose.
- Bring your hands behind your back with the backs of your hands facing each other and your fingers facing down.
- From here flip your hands in the other direction so your fingers are facing up.
- Turn your palms to face each other.
- Press your palms together, draw your elbows slightly back, and open your chest.
- Keep your spine straight.
- Hold this pose for 30 seconds.
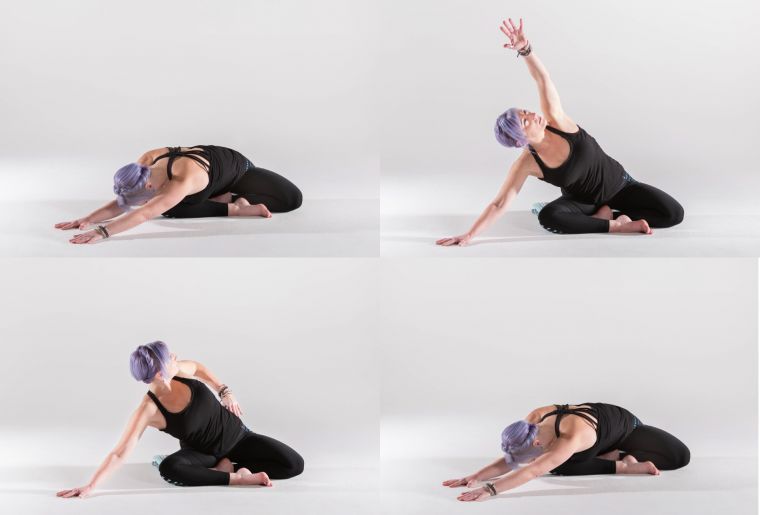
12. Cow face pose
- From a seated position bring your left elbow up to the side of your head with your hand facing down your spine.
- Use your right hand to draw your left elbow over to the right as your hand moves further down your spine.
- If it’s comfortable you can bend your right arm and bring your right hand up to clasp your left hand.
- Hold the pose for 1 minute.
- Repeat on the opposite side.
Tight shoulders can be caused by several factors, including age. Many of the movements you perform in your daily life cause you to bend forward. That strains your shoulders, neck, and back.
You may create tension in your shoulders from everyday activities such as texting, sitting for extended periods, or carrying heavy bags. Weak muscles, poor posture, and incorrect alignment in your body can also lead to tight shoulders. In some cases, muscle tension may also be the result of injury or chronic stress, or an underlying condition, like:
- arthritis
- gout
- lupus
- Lyme disease
See your doctor if your shoulder tightness doesn’t improve once you start stretching, or if you’re experiencing intense pain. You should also see your doctor if you begin to experience muscle weakness in your arms or start to have other symptoms such as fevers.
Your doctor may:
- help you to develop an exercise program
- refer you to a physical therapist
- prescribe medication, such as muscle relaxers or pain relievers
- recommend hot and cold therapy, or the use of a bandage or sling to limit movement
In severe cases, you may require surgery.
It’s important to take care of your shoulders even if they aren’t tight now. Exercising regularly is key to prevention.
- Stay active and engage in activities that require you to use your shoulders, such as swimming or yoga.
- Always drink plenty of water, especially when you exercise.
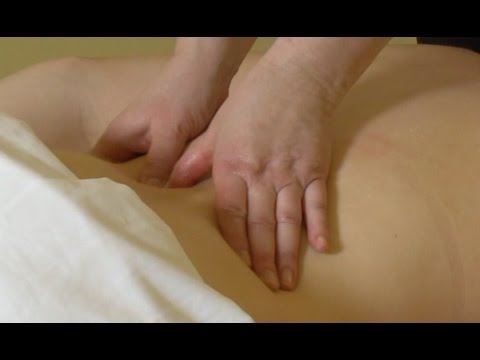
- Go for regular massages if it’s possible, or take a few minutes each day to do self-massage. You may use essential oils diluted in a carrier oil or a muscle rub for this.
- Avoid a sedentary lifestyle and stay as active as possible.
- Try to maintain good posture and proper alignment in your body. Pay attention to your body as you go about your daily tasks. If you sit for long periods, change your position often and get up for a short break every 30 minutes.
- Reduce your stress.
Purchase essential oils, carrier oils, or muscle rub now.
If you notice tension or tightness in your shoulders, it’s important to take steps to relieve the tension as soon as possible. Early treatment can reduce your risk for complications.
It’s a good idea to do exercises to loosen up your shoulders even if you don’t have severe tightness. Try to bring your awareness to this area of your body throughout the day, and work on relaxing and releasing tension. If you’re experiencing long-lasting or intense pain, see your doctor. They may recommend additional therapies or exercises.
Shoulder Mobility Exercises and Stretches with Pictures
Whether you have tightness in your shoulders, are recovering from an injury, or simply want to boost the strength of your shoulder muscles, there are specific stretches and exercises that can be especially beneficial.
Including shoulder-specific exercises and stretches in your overall workout program may help increase your shoulder mobility and flexibility. These movements may also build strength in your shoulders, improve your shoulder function, and prevent injury.
Keep reading to learn more about the shoulder exercises and stretches that may help boost your functional fitness and make it easier to move your shoulders.
Mobility and flexibility are often used interchangeably, but they’re not the same thing, says Alan Snyder PT, DPT.
Flexibility refers to the muscle’s ability to lengthen. Mobility, on the other hand, is the ability of the joint to move through its full range of motion. While they both refer to the overall range of motion in the shoulder, it’s important to know where the limitation is coming from.
“As a physical therapist, joint mobility and the actual biomechanics of the ball and socket joint tend to play a much bigger role in dysfunction,” explains Snyder.
Performing shoulder-specific exercises, like the ones outlined below, can help build strength and mobility in your shoulder muscles and joints. These exercises may also help prevent tightness and subsequent injury.
Before you do any of these exercises, spend 5 to 10 minutes warming up with dynamic upper body stretches such as arm circles, arm swings, and spinal rotations.
“Warming up this way is great for increasing blood flow to a specific area, which also helps with overall performance,” explains Snyder.
If you’re recovering from a shoulder injury or surgery, work with a physical therapist who can help you do the right exercises and stretches for your condition.
1. Standing arm swings
This is a great dynamic exercise that helps to increase blood flow to the shoulder joint.
Doing this exercise as part of a warmup before performing upper body exercises can improve mobility and flexibility in your shoulders and upper back.
Share on Pinterest
To do this exercise:
- Stand tall with your arms by your sides.
- Engage your core and swing your arms forward until they’re as high as you can go. Make sure you don’t raise your shoulders.
- Return your arms to the starting position and repeat.
- Do this movement for 30 to 60 seconds.
2. Shoulder pass-through
The shoulder pass-through exercise helps to increase joint mobility while still engaging the surrounding muscles of the shoulder.
This exercise requires a holding a long stick, like a broomstick or PVC pipe.
Share on Pinterest
To do this exercise:
- Stand with your feet shoulder-width apart and your arms in front of your body.
- Hold a stick, like a broomstick or PVC pipe, with an overhand grip. Your arms will be wider than shoulder-width. Make sure the stick or pipe is parallel to the floor.
- Engage your core and slowly raise the broomstick or pipe above your head, keeping your arms straight. Only go as far as comfortable.
- Hold the pose for a few seconds.
- Return to the starting position.
- Repeat 5 times.
3. High-to-low rows
According to Snyder, hi-to-low rows really challenge the upper back and thoracic muscles, which provide a lot of stability to the shoulder joint. This exercise requires a resistance band. You can also do this exercise at the gym using a cable machine.
Share on Pinterest
To do this exercise:
- Secure a resistance band to a sturdy object above shoulder height.
- Kneel down on one knee and grab the band with the opposite hand. The other hand can rest at your side.
- Pull the band toward your body while keeping your torso and arm straight. Focus on squeezing the shoulder blades together.
- Return to the starting position and repeat.
- Do 2–3 sets of 10 repetitions on each side.
4. Reverse fly
Like the high-to-low rows, the reverse fly exercise targets the upper back and thoracic muscles that provide a lot of stability to the shoulder joint. This exercise requires a set of light dumbbells.
Share on Pinterest
To do this exercise:
- Hold a dumbbell in each hand.
- Stand with your feet shoulder-width apart, knees slightly bent.
- Engage your core and bend forward at the waist. Keep your back straight. Your arms will be extended.
- Raise your arms away from your body. Focus on squeezing your shoulder blades together. Stop when you get to shoulder height.
- Slowly return to the starting position and repeat.
- Do 3 sets of 10 repetitions.
5. Rotation with dumbbell
Rotation with a dumbbell allows you to warm up the shoulder for overhead and throwing motions. According to Snyder, this is standard practice for most athletes who extend their arms overhead and externally rotate during their sport.
Share on Pinterest
To do this exercise:
- Stand with your feet shoulder-width apart while holding a light dumbbell in your right hand.
- Raise your arm so your elbow is at shoulder height.
 The front of your hand will be facing the ground.
 - Rotate your shoulder to bring your arm and weight up so your hand is raised toward the ceiling.
- Slowly return to the starting position and repeat before changing sides.
- Do 2–3 sets of 12 repetitions on each arm.
The main benefit of stretching the shoulder, says Snyder, is to prevent injury to the muscles and joints.
Since the stretches listed below fall under the category of static stretches, consider doing them after a workout or immediately following a warmup that includes dynamic stretches.
6. Cross-arm stretch
The cross-arm stretch targets the rotator cuff muscles. You should feel a good stretch in the rear shoulders.
Share on Pinterest
To do this stretch:
- Stand with your feet slightly less than shoulder-width apart and bring your right arm up to a little less than shoulder height.
- Place your left hand on your right elbow and gently pull your right arm across your body using the left hand to support your arm.
- Hold this position for up to 30 seconds.
- Repeat on the opposite side.
- Do each side 3–5 times.
7. Sleeper stretch
Snyder likes the sleeper stretch because it’s an excellent way to work internal rotation for the shoulder.
This stretch is often recommended when dealing with a shoulder injury or during rehab.
While you can do this stretch on both sides for general health, if you have an injury, the emphasis should be on the affected side.
Share on Pinterest
To do this stretch:
- Lie on the affected side. If you have no injury or pain, choose a side to start with. Your shoulder should be stacked underneath you.
- Bring your elbow straight out from your shoulder and bend this arm, so your fingers are pointing toward the ceiling. This is the starting position.
- Gently guide this arm toward the floor using the unaffected arm. Stop when you feel a stretch in the back of your affected shoulder.
- Hold this position for up to 30 seconds.

- Do 3 repetitions before changing sides.
8. Doorway stretch
The doorway stretch allows you to stretch each side of your chest individually, which helps if one side is tighter than the other.
This stretch helps to open the pectoralis muscles in your chest and increases the range of motion in your shoulders.
Share on Pinterest
To do this stretch:
- Stand in a doorway with elbows and arms forming a 90-degree angle. Your feet should be in a split stance.
- Bring your right arm up to shoulder height and place your palm and forearm on the doorway.
- Gently lean into the stretch, only going as far as comfortable.
- Hold the stretch for up to 30 seconds.
- Change sides and repeat. Perform on each side 2–3 times.
9. Chest expansion
Chest expansion is a good way to stretch your back muscles, open your chest, and increase range of motion in your shoulders. Snyder says it can also help expand your lungs to receive oxygen better.
Share on Pinterest
To do this stretch:
- Stand tall with your feet together.
- Hold the end of a towel or exercise band in each hand, with your arms behind your body.
- Use the towel or band to help move your shoulder blades together and open your chest. This will cause you to look toward the ceiling.
- Hold this pose for up to 30 seconds.
- Repeat 3–5 times.
10. Child’s Pose
Commonly known as a yoga move, Snyder says Child’s Pose is a good way to open the shoulder joint into flexion (forward bending) and to stretch your latissimus dorsi, or lat, muscles. Your lower back can also benefit from this pose.
Share on Pinterest
To do this stretch:
- Kneel on an exercise mat. Make sure your body is upright.
- Slowly crawl your hands forward until your arms are extended in front of you. Keep your gaze downward.
- Lower your torso onto your thighs and your forehead on the ground.
- Hold this position while taking three deep breaths.
- Repeat 3–5 times.
To keep your shoulder mobility exercises safe and effective, keep these tips in mind.
- Stop if you feel any pain. Slight discomfort is normal, but you shouldn’t feel sharp pain while you’re doing these exercises or stretches. Stop right away if you experience pain.
- Remember to breathe. Breathing can help relieve stress and tension in your shoulders, back, and the rest of your body. Breathing well may also help you do an exercise or stretch for longer.
- Start slowly. If you’re new to working out or doing shoulder exercises, don’t try to do too much too soon. Start with just a few exercises and stretches at first, then add more as you build your strength.
- Check with your doctor or physical therapist. If you’ve had shoulder surgery, an injury, or a lot of shoulder pain, it’s important to check with your doctor or physical therapist before doing shoulder mobility exercises and stretches.
Whether you’re an athlete, gym enthusiast, or just trying to improve the health, strength, and mobility of your shoulder muscles and joints, specific shoulder exercises and stretches are an important part of any workout routine.
Performing shoulder-specific exercises and stretches can help:
- increase your range of motion
- reduce tension
- improve flexibility
- prevent injury
If you’re new to shoulder exercises and stretches, consider working with a personal trainer or physical therapist. They can help you perform the movements with the correct form and technique.
11 exercises to relieve tension in the neck and shoulders / AdMe
Many of us are familiar with the state when the neck muscles are stiff and the shoulders are tense. Well, if the pain is caused by stress, the habit of sitting in the wrong position or lack of physical activity - in this case, regular muscle stretching exercises can significantly alleviate your condition and even permanently relieve pain.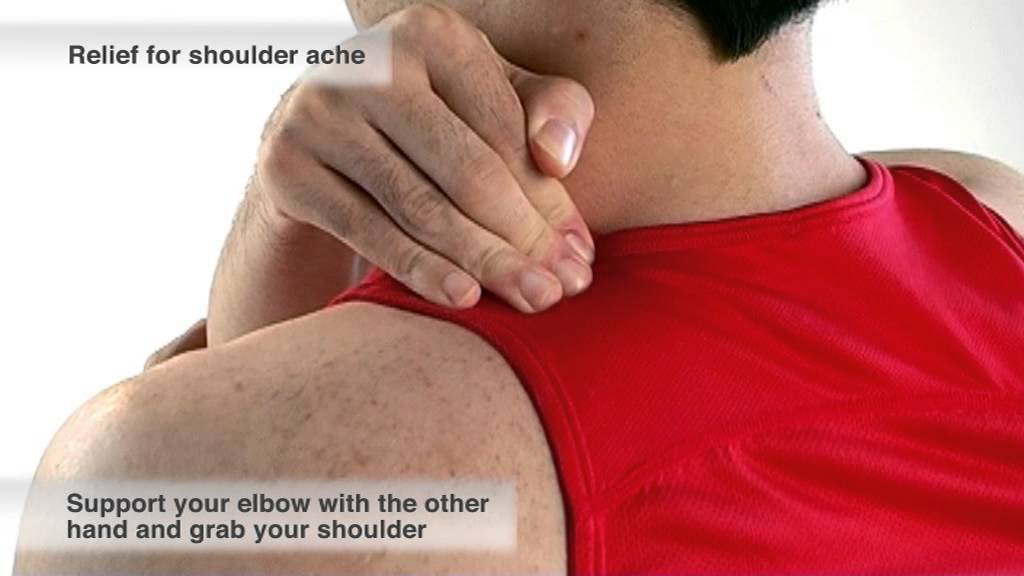 The key word here is "regular".
We at ADME have found some very effective stretching exercises to help with neck and shoulder pain.
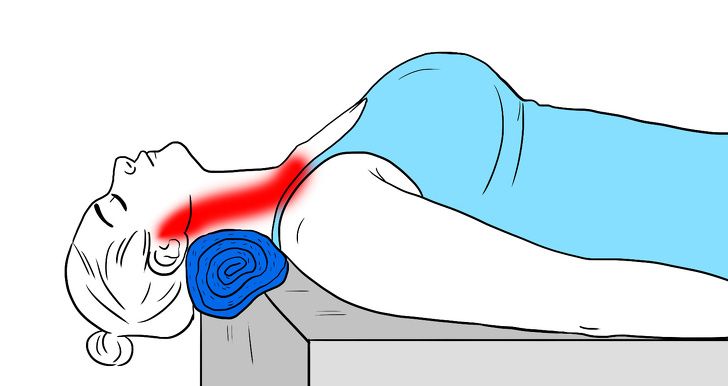
1. Neck roll
This is a very gentle stretch that is used to relieve tension in the entire neck .
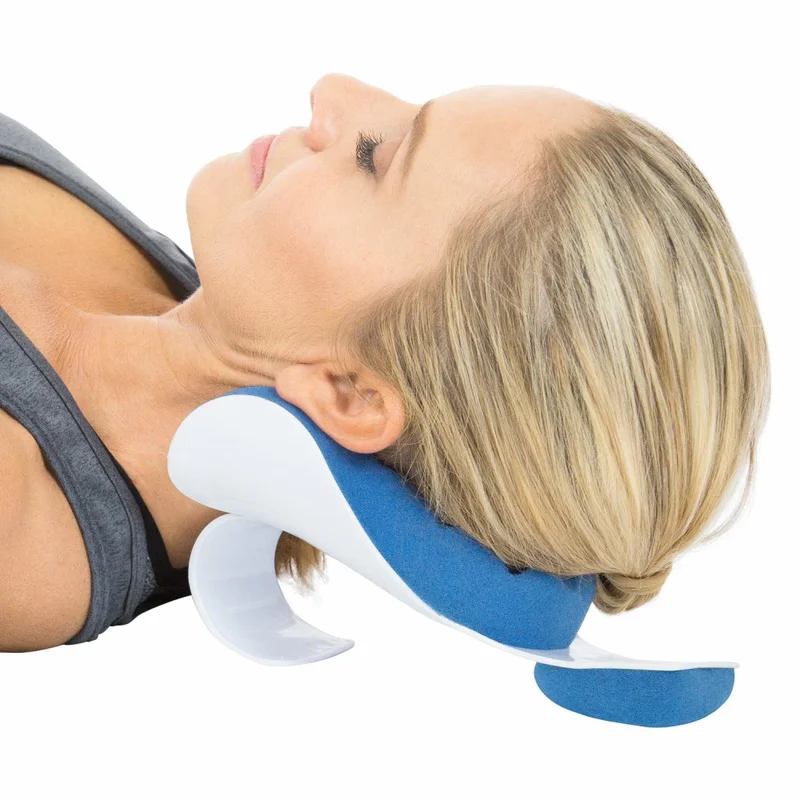
- Turn the towel with a roller
- Put it under the base of the skull
- Remove your head back and completely relax
- Stay in this position for 10 minutes if you do not experience pain
2. Stretching of the neck with hands
This is exercise provides deep stretching back of the neck and upper back .
- Sit comfortably on a chair or on the floor
- Clasp your hands behind your head
- Gently pull your head down trying to bring your chin to your chest
- Hold your head in this position for 30-40 seconds, then slowly return to the starting position and 901 disengage8
3.
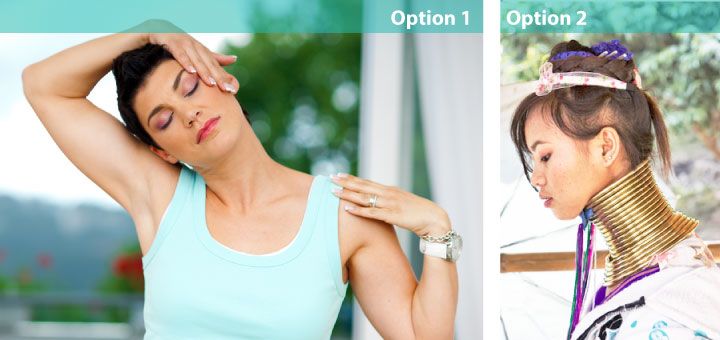
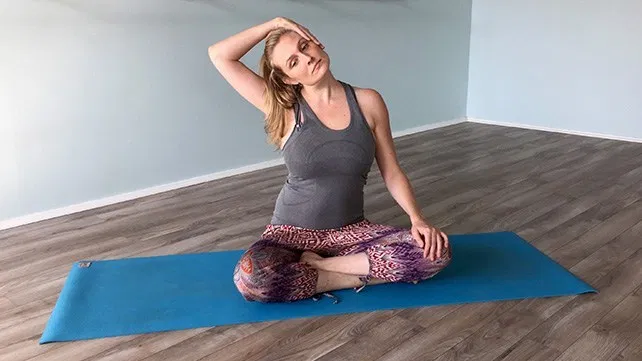
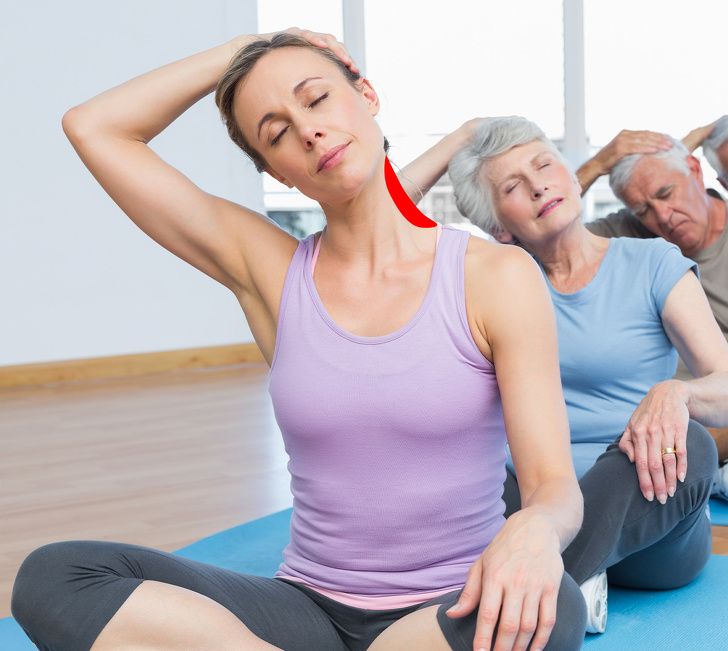
 Lateral head tilt
 ©Depositphotos.com
The purpose of this exercise is to stretch the left and right sides of the neck .
- Sit comfortably on a chair or on the floor
- Place your right hand on the top of your head and gently pull your head to the right
- Keep your back straight and relax your shoulders
- Remain in this position for 30-40 seconds, then slowly return your head to the starting position Repeat the same for the other side
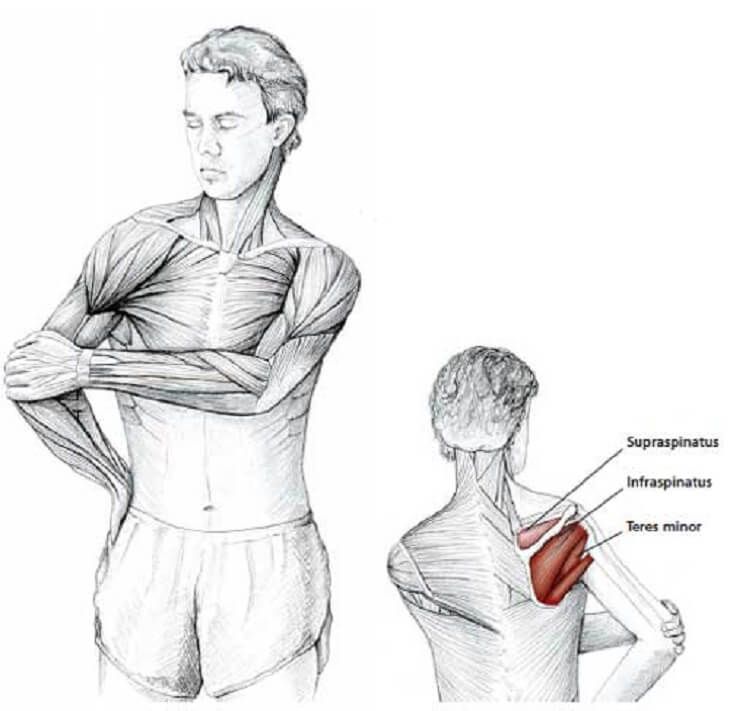
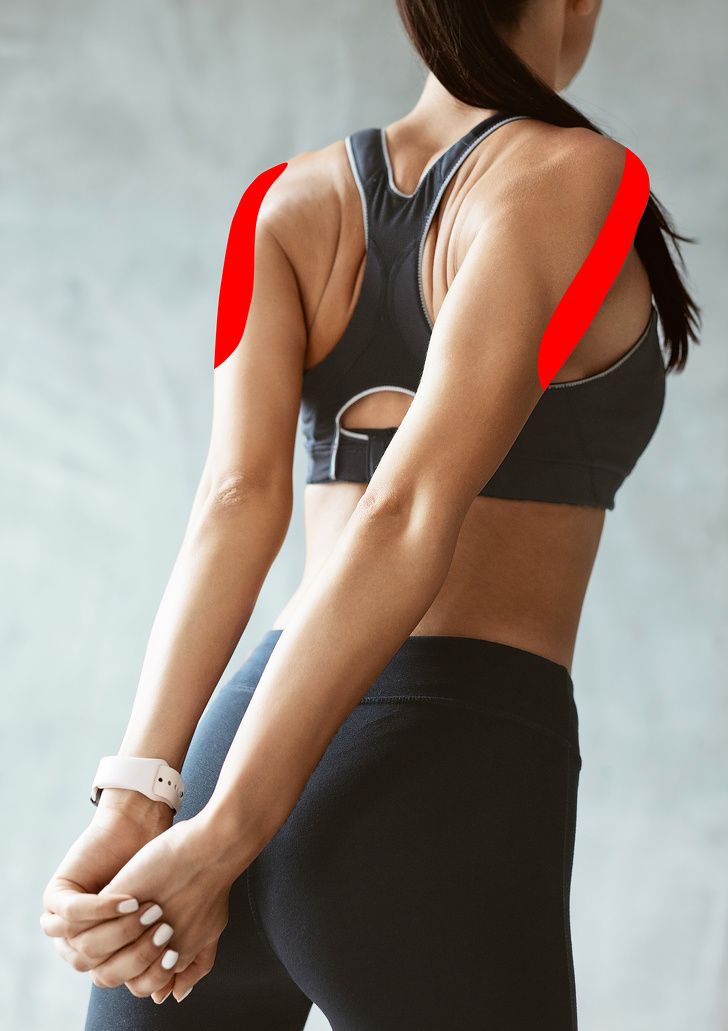
4. Upper trapezius stretch
This stretch works both neck and shoulders .
- Place your right hand behind your back and grasp your left hand around your wrist
- Gently pull your hand towards your left foot
- Tilt your left ear towards your left shoulder
- Hold this position for
 This way you also engage the upper trapezius muscles, but change the angle a little.
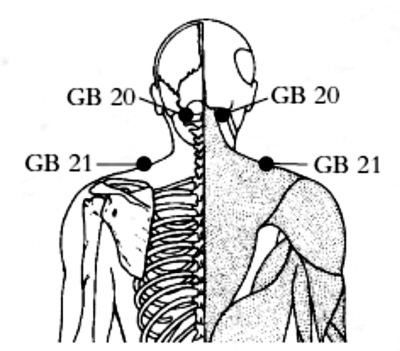
5. Stretching the levator scapula muscle
This exercise works the shoulders and lateral muscles of the neck .
- Sit on a chair and grab it from behind with one hand
- Point your chin to your chest and your ear to your left shoulder
- Rotate your head alternately 45° to the left and 45° to the right. You can help yourself by putting your hand on your head, but without effort. All movements should be very gentle
- Hold the head at the extreme points for 20-30 seconds
- Get on all fours
- Then start moving your left hand, palm up, into the space between your right hand and knees, rotating your torso until your head touches the floor
- Hold this position for 30-40 seconds, then repeat for other side
7. Shoulder rotation
©Depositphotos. com
com
This movement relieves tension in the shoulders .
- Stand or sit with your back and neck straight
- Raise your shoulders up, then lower them back and down in a circular motion
- Move smoothly, keeping your head close to your neck, forming a double chin
8.9002 Stretch arm over shoulder
©Depositphotos.com
This stretch is good not only for your biceps, but also for shoulders .
- Stand with your feet shoulder-width apart
- Stretch your left arm across your chest to the right
- Press your left elbow close to your body with your right hand
- Remain in this position for 10-20 seconds, then repeat with the other arm
5
©Depositphotos.com
This stretch targets many muscles, including shoulders .
- Raise your left arm straight up, then bend it and put it behind your head
- Put your right arm behind your back, reach your left hand and clasp your hands in the lock
- Stay in this position for 10 seconds, then release your hands and start symmetrical execution exercises
If you cannot clasp your hands behind your back, use a towel. Hold it with the hand behind your head. With your other hand, reach for the towel, creating a gentle stretch.
10. Wall Arm Stretch
© Depositphotos.com
This stretch is great for tension in the shoulders .
- Place your left hand against the wall. The palm may also be touching the wall or facing the ceiling
- Press the shoulder against the wall
- Turn the chest slightly away from the wall, creating a gentle stretch
- Hold this position for 30-40 seconds and repeat with the other arm
11. Double front shoulder stretch
©Depositphotos.com
This is a very intense stretch for shoulders .
- Stand up straight
- Clasp your hands behind your back
- Raise your arms until you feel a stretch
- Hold this position for 30-40 seconds, repeat 3 times more
- lean forward
Do you have any other proven neck and shoulder exercises? Tell us about them in the comments and share this article with your friends.
6 exercises to relax your back and neck after a day's work
August 15, 2019
If you spend a lot of time sitting at the computer, then the lack of movement must be compensated daily.
Simple exercises that do not require significant physical effort will help you relieve tension from a tired back and neck. You can perform them at home after a working day, and the result will replace your professional massage therapist!
1. Head tilt
Sit on a chair. Place your right hand on the top of your head and tilt your head slightly to the right, keeping your back straight. Hold for 30-40 seconds, slowly return to the starting position. Repeat 5 times for each side.
Why: Helps relieve neck tension.
2. “Cat”
Get on all fours and lean on your hands. As you exhale, arch your back as much as possible, lower your head. On an inhale, bend down and lift your head up. Repeat 10 times.
Why: Stretches the muscles of the back and neck, helps to avoid slouching.
3. Wall lean
Stand facing a wall two steps away from it. Place your feet hip-width apart. Lean forward and place your hands on the wall. An angle of 90° should form between the body and legs. Straighten and stretch the spine as much as possible; stay in this position for 20-30 seconds. Repeat 5 times.
Why: stretches the back, improves posture.
4. Butterfly wings
Sit on the edge of a chair with your feet shoulder-width apart. Bend your elbows, throw them behind your head and interlock your fingers at the back of your head. Extend your elbows as much as possible. As you inhale, open your arms to the sides and stretch your chest forward. As you exhale, put your hands behind your head again and bend your back back. Feel the tension in the muscles. Repeat 5 times.
Why: restores the correct position of the spine.
5. Chair Crunches
Sitting upright in a chair, gently turn your torso and shoulders to the side. To increase the amplitude and turn around more strongly, grab the back of the chair with your nearest hand. Hold for 15-20 seconds. Repeat 5 times for each side.
Why: relieves back pain, straightens the spine.
6. Child's Pose
Kneel down with your feet together. Place your buttocks on your heels. As you exhale, lean forward and rest your forehead on the floor. Stretch your arms along your torso with your palms up. Stay in the position for 1 to 3 minutes, focusing on how the spine is stretched.
Why: effectively relieves tension in the muscles of the back and neck. An ideal exercise to complete the charge.
Important! Perform exercises slowly and without sudden movements.