Cutting off a friend
3 ways to end a toxic friendship
Friends are the best…until they’re the worst – and that’s when things can get really tricky. If you’re feeling belittled, put down, uncomfortable or pressured, you might be dealing with a toxic friendship.
Being in a toxic friendship can really suck, and it’s hard to know how to deal with it. If you want to make it work, check out our guide to dealing with a toxic friendship for some tips. If you’ve tried but your friend isn’t meeting you halfway, it might be time to think about ending the friendship gracefully, even though it’ll be hard.
Cutting a friend out of your life because they have hurt you is a big decision to make when you’re feeling very emotional. Perhaps, when you’re feeling calmer, you’ll be able to work things out with your friend; only you can decide whether you want to save the friendship. A lot of people find, though, that with a little time and patience, friendships can grow stronger after moving through hard times together.
If you can see no way forward, here are some ways you might consider ending a toxic friendship.
Fade them out
The slow fade only works if you’re both on the same page and are mutually putting less effort into your friendship. It’s a non-confrontational approach that’s often effective.
Here are some things to try:
- Don’t message or call them as frequently. If you used to text three times a week, bring it down to twice a week, and then once a week.
- If it’s tricky because you’re all in the same group, you could try limiting your catch-ups to group stuff so that your interactions are less personal.
However you do it, it isn’t easy ending a friendship. Remember that the fade-out is only healthy if you’re both pulling away. If it’s not mutual, this could make your friend feel like you are ignoring or judging them. For example, if they ask you why you’re not hanging out with them, this means that the fade-out isn’t mutual.
If this is the case, or if you’d rather be upfront about ending the friendship, having a direct conversation to clear the air could work better for you.
Officially end the friendship
This method involves sitting down with the person and letting them know that the friendship is over. This is a pretty tough option and requires a lot of courage from you, the same way that breaking up with a partner would. The great thing is, it gives you both the opportunity to get everything out in the open and get closure.
Learn here how to have the conversation with your friend.
Completely drop them
If your friend is being physically or emotionally abusive or making you feel like crap – for example, they call you names to put you down, physically hurt you, threaten you or control you – this is not okay. You don’t owe them anything and you have the right to remove yourself from the situation.
To stop the friendship, delete or block them on social media, or anywhere else they might be able to contact you. If you go to school or uni with them, see if you can make sure you’re not in any classes together.
But remember, cutting off a friendship can have major consequences. Your friend could become aggressive or cruel towards you, and you might lose some of your mutual friends. Make your friends aware of the situation and have them there for you as support. It’s worthwhile also letting them know that you don’t expect them to choose sides.
Breaking up a toxic friendship is something you have to do for yourself. When you move away from a toxic friendship, you’ll be moving on from a whole lot of negativity and will be free to be yourself.
Getting help
Sometimes, we need professional help to deal with the effects of ending a relationship. Also, if you think your friend needs to talk to someone, or that they’re a risk to themselves or others, encourage them to seek help.
You could visit your school or uni counsellor to begin with. These counsellors are normally available during school/uni hours and you can make an appointment with them for a free session. Check out our getting help section for more information on who can help.
If you feel like you need to talk about what’s going on, contact a phone counselling service such as Lifeline (13 11 44) or Kids Helpline (1800 55 1800).
How to End a Friendship
There's no real protocol for cutting off a friendship—which can lead to a whole lot of confusion. Barbara Graham shines a light into the mist.
By Barbara Graham
Photo: Thinkstock
I have this friend, Sarah. Since meeting in our thirties, we've shared many of life's essentials: hairdressers, dog-walkers, phobias (airplanes and mice), health scares, worries over our kids, and insomnia caused by husbands who snore. But lately I'm aware that whenever Sarah calls I feel a tightness in my chest and, more often than not (thanks to caller ID), I don't pick up the phone. I feel guilty, but that's preferable to spending hours listening to Sarah complain. I've been meaning to tell her how I feel, but I haven't quite worked up the nerve. Most of the time I feel like a bad boyfriend.
Then there's Natalie, whom I fell in love with when I was 9. We became inseparable and, at one point, I secretly tried to find out if it was possible to be adopted by your best friend's family if your own parents were still alive. It wasn't until college and postcollegiate life on opposite sides of the country that we drifted apart. But we never lost touch and, years later, when I moved with my husband to the city where Natalie lives, she seemed thrilled. She threw a dinner party in our honor and did everything possible to make us feel at home. Then, after about six months, Natalie suddenly stopped calling, and whenever I tried to make a date she claimed she was too busy and got off the phone, fast. To this day—ten years later—I have no idea why she gave me the boot. Now when our paths cross, we greet each other like distant acquaintances and I feel bruised all over again.
It is strange that friendships, which nourish and sustain us and often provide our deepest source of connection, lack the sort of standards that are routine in romantic relationships. If your significant other stops calling, makes impossible demands, or treats you like roadkill, you deal with it. It may not be easy—you may put it off—but eventually you'll find out where you stand. Not so with friends.
"You don't get together and say, 'I'm really mad at you, I'm not going to see you anymore,'" says Ruthellen Josselson, PhD, a Baltimore psychotherapist and coauthor with Terri Apter, PhD, of Best Friends (Three Rivers Press). "To the extent that we have a ritual, it's not calling, not getting together. But that makes it difficult to know when someone is distant because she doesn't want to be your friend or because something's going on in her life that's keeping her from being in touch."
So how do you know you're being fired? And what do you do when you're at your wit's end—as I am with Sarah—and ready to issue a pink slip of your own? "It's a complicated dance.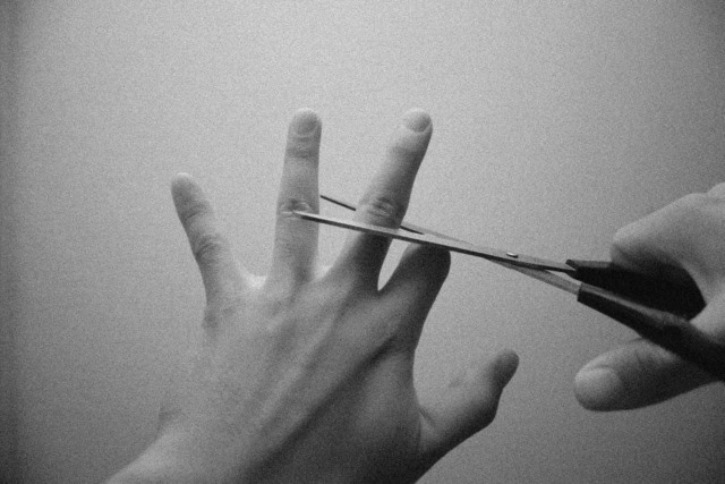 We start learning the steps when we're quite young, and they don't change all that much," Josselson says. If nobody calls or makes a move, if you run into each other and say, "Let's do lunch," but don't, if one person is suddenly booked until 2013, sooner or later the message gets through.
Luckily, most friendships have a natural life cycle. Often we're drawn together by circumstance—work, the single life, kids—and as our situations change, we gradually drift apart. On a deeper level, our friendships mirror our internal life. "As we gain a stronger sense of self, what used to matter no longer does, and we're bound to outgrow certain friendships," says Florence Falk, PhD, a New York City psychotherapist. "Once you're aware of that, without being cruel or feeling guilt-ridden, you can begin to let go of relationships that no longer nourish your most authentic self."
Occasionally, though, a friend all but forces a clean break. My pal Nancy reports, "I'd been close to Anne for years, but at a certain point I felt overwhelmed by her need for me. She acted as if I belonged to her and became resentful when I socialized with other people. I felt drained, suffocated. When I tried to talk to her about it I got nowhere, so I wrote her an e-mail explaining that I just couldn't be friends with her anymore." Anne was predictably enraged and fired off a response accusing Nancy of being selfish and uncaring. But even though the exchange was painful, Nancy emerged feeling as if a great weight had been lifted.
In my own life, I seem to have a knack for attracting needy friends. Even though I joke about my nonpaying "caseload," I struggle to set limits.
"Women seem to be both hardwired and socialized to be nurturing," says Sandy Sheehy, author of Connecting: The Enduring Power of Female Friendship (William Morrow). The upshot is that many of us get stuck in draining relationships. Sheehy tells the story of Martha, a graduate student, wife, and mother who felt sucked dry by an emotionally dependent friend. After unsuccessfully trying the usual stop-calling-and-drift method, Martha found a way to extricate herself while allowing the other woman to preserve her dignity. She said, "I can't be the friend you want me to be." Sheehy says, "Martha took the burden of inadequacy on herself." It's like a boyfriend telling you, "I can't love you the way you deserve," instead of saying, "I don't love you."
Sheehy also recommends explicitly calling it quits if you have what she terms an enabling friendship. "Maybe you started out as drinking pals or shared a shopping jones, but now you want to stop the behavior that brought you together," she says. "It's more responsible to admit that you don't think you can maintain intimacy and not binge than to pretend you can't see her because you've suddenly taken up scuba diving."
Although the troublesome twins—envy and jealousy—are at the root of many breakups, they're more difficult to address gracefully. Ruth, a moderately successful painter, remained silent on the occasion of her friend Carolyn's first solo art show. When Carolyn asked her why, Ruth said she thought it best not to respond because she hated the work. "It was obvious that she hated me for getting a one-woman show before she did, but she couldn't admit it," Carolyn says. The former bosom buddies haven't exchanged a word since.
Sadly, many friendships end needlessly because we're afraid to acknowledge conflict. "If you notice you're withdrawing from someone who really matters to you, you have to ask yourself why," Josselson says, adding that we anticipate tension in our relationships with men, but not with other women. But at some point, any meaningful friendship is bound to provoke difficult feelings. "Once you accept that, you can talk about things as they come up and there's a good chance you'll become closer," she says.
Sometimes the conditions of a relationship change, especially one forged during a time of mutual crisis, but the unspoken contract on which the friendship is based stays the same—which is what happened to my cousin Paula and her best friend, Elaine.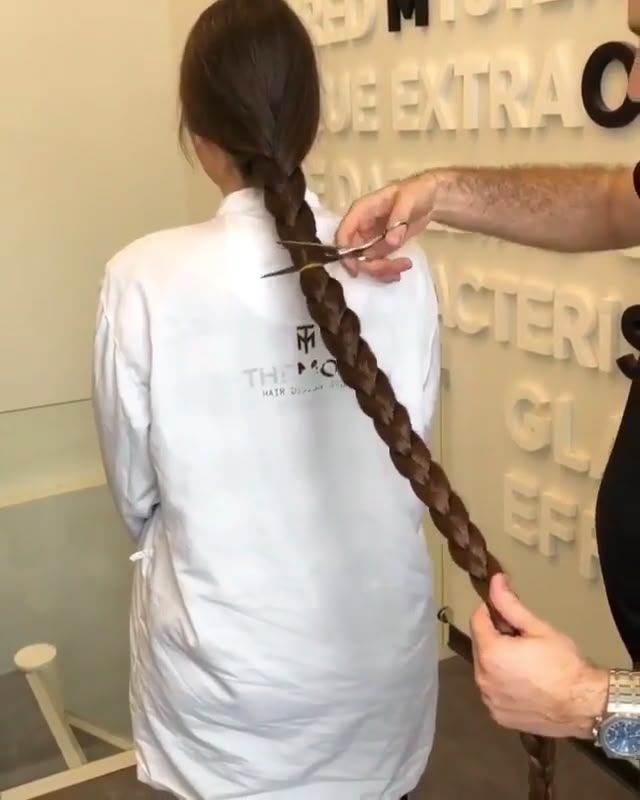 The two women became joined at the hip when both were having marital problems. "It was almost like another marriage," Paula says. "We did everything together." Eventually, Paula and her husband resolved their differences, while Elaine and her husband parted. "I was terrified to tell Elaine that even though I still loved her, our friendship could no longer be as all-consuming," Paula says. "But I knew that if I didn't say something, I'd withdraw completely." Fortunately, Elaine was able to adjust her expectations and the pair found a new way of relating that was comfortable for both.
Despite our best intentions, talking doesn't always repair the rift: Not everyone is able to listen without becoming defensive or blaming the other person. Feelings stirred up by a close friend often echo unresolved issues from childhood, like sibling rivalry or fear of abandonment, and unless those feelings are acknowledged, no amount of discussion can save the relationship. "My friend Gail seemed to have me confused with her older sister, whose attention she'd always craved," says Joan. "I spent years trying to convince her that I really cared, but eventually I threw up my hands. I told her I didn't have the time or energy to give her the constant reassurance she needed." Gail felt hurt and rejected, and a 20-year bond was severed in a single phone call.
Bottom line: There's no single template for friendship. Some people are in our lives because they carry a precious shard of our history, while others reflect our passions and priorities right now. Still others are in danger of becoming ex-friends because we're either too preoccupied to pick up the phone or too scared to speak our minds. As Virginia Woolf said, "I have lost friends, some by death—others through sheer inability to cross the street." Which brings me back to Sarah: I'm not sure where this friendship is headed, but I realize I still care enough to cross the street and let her know why I've been so out of touch. As for Natalie, I hope that one day she'll do the same.
Barbara Graham, a regular contributor to O, is the author of Eye of My Heart.
More on Friendship
- More ways to say goodbye (and good riddance!)
- The friendship quiz: Good friend, bad friend?
- What to do when you're feeling left out
From the August 2001 issue of O, The Oprah Magazine.
From the August 2001 issue of O, The Oprah Magazine
NEXT STORY
Cutting, splitting, and cropping objects in Illustrator
User's Guide Cancel
Search
- Illustrator User Guide
- Illustrator basics
- Introduction to Illustrator
- What's new in Illustrator
- Frequently Asked Questions
- Illustrator System Requirements
- Illustrator for Apple Silicon
- Working environment
- Working environment basics
- Learn faster with Illustrator's Search panel
- Create documents
- Toolbox
- Default key combinations
- Customizing keyboard shortcuts
- Introduction to artboards
- Managing artboards
- Work environment setup
- Properties panel
- Parameter setting
- Working environment "Touch control"
- Microsoft Surface Dial support in Illustrator
- Undo changes and design history management
- Rotate view
- Rulers, grids and guides
- Accessibility in Illustrator
- Safe Mode
- View graphic objects
- Working in Illustrator using the Touch Bar
- Files and templates
- Illustrator Tools
- Tools at a Glance
- Tool selection
- Selection
- Partial selection
- Bulk selection
- Magic wand
- Lasso
- Artboard
- Selection
- Navigation tools
- Hand
- Rotate view
- Scale
- Drawing Tools
- Gradient
- Mesh
- Creating Shapes
- Gradient
- Text tools
- Text
- Text on a contour
- Vertical text
- Text
- Drawing tools
- Pen
- Add reference point
- Delete control points
- Reference point
- Curvature
- Line segment
- Rectangle
- Rounded rectangle
- Ellipse
- Polygon
- Star
- Brush
- Blob brush
- Pencil
- Shaper
- Fragment
- Modification tools
- Rotation
- Reflection
- Scale
- Curvature
- Width
- Free Transform
- Pipette
- Mix
- Eraser
- Scissors
- Quick Actions
- Retrotext
- Luminous neon text
- Old-fashioned text
- Repainting
- Convert sketch to vector format
- Introduction to Illustrator
- Illustrator on iPad
- Introducing Illustrator on iPad
- An overview of Illustrator on iPad.

- Illustrator on iPad FAQ
- System requirements | Illustrator on iPad
- Do's and Don'ts in Illustrator on iPad
- An overview of Illustrator on iPad.
- Operating environment
- Illustrator workspace on iPad
- Touch shortcuts and gestures
- Keyboard shortcuts for Illustrator on iPad
- Manage application settings
- Documents
- Working with documents in Illustrator on iPad
- Import Photoshop and Fresco documents
- Selecting and arranging objects
- Creating repeating objects
- Objects with transitions
- Drawing
- Creating and modifying contours
- Drawing and editing shapes
- Text
- Working with text and fonts
- Creating text labels along a path
- Adding custom fonts
- Working with images
- Vectorization of raster images
- Color
- Applying colors and gradients
- Introducing Illustrator on iPad
- Cloud documents
- Basics
- Working with Illustrator cloud documents
- Share and collaborate on Illustrator cloud documents
- Publication of documents for verification
- Cloud storage update for Adobe Illustrator
- Cloud documents in Illustrator | Frequently Asked Questions
- Troubleshooting
- Troubleshooting creating or saving cloud documents in Illustrator
- Troubleshoot cloud documents in Illustrator
- Basics
- Adding and editing content
- Drawing
- Basic drawing
- Edit contours
- Drawing a graphic object with pixel-level precision
- Draw with the Pen, Curvature, and Pencil tools
- Drawing simple lines and shapes
- Image trace
- Contour simplification
- Definition of perspective grids
- Symbol tools and symbol sets
- Correction of contour segments
- Making a flower in five easy steps
- Drawing perspective
- Symbols
- Drawing pixel-aligned outlines when creating designs for the web
- 3D objects and materials
- Learn more about 3D effects in Illustrator
- Creating 3D graphics
- Projecting a pattern onto 3D objects
- Creating 3D text
- Learn more about 3D effects in Illustrator
- Color
- About color
- Choice of colors
- Using and creating color swatches
- Color correction
- Adobe Color Themes panel
- Color groups (harmonies)
- Color Themes Panel
- Recoloring a graphic object
- Coloring
- About coloring
- Coloring with fills and strokes
- Live Paint Groups
- Gradients
- Brushes
- Transparency and Blending Modes
- Apply strokes to objects
- Creating and editing patterns
- Nets
- Patterns
- Selecting and organizing objects
- Selecting objects
- Layers
- Grouping and collating objects
- Move, align and distribute objects
- Placement of objects
- Locking, hiding and deleting objects
- Copying and duplicating objects
- Rotate and flip objects
- Object weave
- Redrawing objects
- Cropping images
- Transform objects
- Combining objects
- Cutting, splitting and trimming objects
- Puppet deformation
- Scale, skew and distort objects
- Objects with transitions
- Redrawing with shells
- Redrawing objects with effects
- Creating shapes with the Shape Maker and Shape Builder tools
- Working with live corners
- Improved touch-enabled repaint processes
- Edit clipping masks
- Dynamic figures
- Creating shapes with the Shape Builder tool
- Global change
- Text
- Adding object types to text and work objects
- Create bulleted and numbered lists
- Text area control
- Fonts and decorations
- Text formatting
- Import and export of text
- Paragraph formatting
- Special characters
- Creating text along a path
- Character and paragraph styles
- Tab
- Text and fonts
- Search for missing fonts (Typekit workflow)
- Update text from Illustrator 10
- Font for Arabic and Hebrew
- Fonts | Frequently Asked Questions and Troubleshooting Tips
- Creating a 3D text effect
- Creative Design
- Scale and rotate text
- Leading and letter spacing
- Hyphenation and line breaks
- Text enhancements
- Spell checker and language dictionaries
- Asian character formatting
- Composers for Asian scripts
- Creation of text projects with transitions between objects
- Create a text poster using image tracing
- Creating special effects
- Working with effects
- Graphic styles
- Shading
- Design attributes
- Sketching and mosaic
- Shadows, glows and shading
- Overview of effects
- Web Graphics
- Web Graphics Best Practices
- Diagrams
- SVG
- Animation creation
- Fragments and image maps
- Drawing
- Import, export and save
- Import
- Putting multiple files in a document
- Managing linked and embedded files
- Communication information
- Image extraction
- Import artwork from Photoshop
- Import bitmaps
- Import Adobe PDF files
- Import EPS, DCS and AutoCAD files
- Creative Cloud Libraries in Illustrator
- Creative Cloud Libraries in Illustrator
- Save Dialog Box
- Preservation of illustrations
- Export
- Using an Illustrator graphic in Photoshop
- Export illustration
- Collection of resources and their bulk export
- Packing files
- Create Adobe PDF files
- CSS Extraction | Illustrator CC
- Adobe PDF Options
- File information and metadata
- Import
- Printing
- Preparing to print
- Setting up documents for printing
- Changing page size and orientation
- Setting crop marks for trimming and straightening
- Getting Started with Large Canvas
- Printing
- Overlay
- Color managed printing
- PostScript printing
- Print styles
- Marks and bleed
- Printing and saving transparent graphics
- Trapping
- Printing of color plates
- Printing gradients, meshes and color overlays
- White overlay
- Preparing to print
- Automating tasks
- Combining data using the Variables panel
- Automation using scripts
- Automation using operations
- Troubleshooting
- Crash problems
- Restoring files after a crash
- File problems
- Supported file formats
- GPU driver problems
- Problems with Wacom devices
- Problems with DLL files
- Memory problems
- Problems with settings file
- Problems with fonts
- Printer problems
- How to share a crash report with Adobe
- Illustrator performance improvement
Learn how to cut, split, and crop objects into geometric or freeform shapes.
You can cut an object, divide it into a mesh, and cut the path at selected anchor points using various menu options. You can also use the Scissors tool to split the path and the Knife tool to manually cut out objects. In addition, you can select a clipping mask to hide parts of an object, and a navigator to clip overlapping objects.
Commands for cutting and splitting objects
Split lower objects
Example of using the Split Bottom Objects commandThe Split Bottom Objects command acts as a cookie cutter or stencil. This tool uses the selected object to cut through other objects, resetting the original selection.
-
Select an object to be used as a stencil and position it so that it overlaps the object to be cropped.
-
Choose Object > Path > Split Bottom Objects.
Grid division
Divide By Grid Example The Divide By Grid command allows you to divide one or more objects into a set of rectangular objects aligned in rows and columns. It allows you to precisely change the height, width and size of the middle between rows and columns, as well as quickly create guides for planning a picture.
-
Select an object.
If multiple objects are selected, the appearance attributes of the top object are used for the resulting mesh of objects.
-
Select Object > Path > Grid Subdivision.
-
Enter the desired number of rows and columns.
-
(Optional) Do any of the following:
-
Enter the Height and Width values to size each row and column.
-
To specify the amount of space that separates rows and columns from each other, enter a value for Center.
-
To resize the entire feature grid, enter values for Total.
-
To add guides along the edges of rows and columns, select Add guides.
-
-
Click OK.

Cut contour using selected anchor points
Example: Using the Cut Path at Selected Anchor Points toolThe Cut Path at Selected Anchor Points tool (with the icon) cuts a path at an anchor point, resulting in two anchor points directly above each other.
-
(Optional) Select the path to see its current anchor points.
-
Use the Direct Selection Tool () to select the anchor point where you want to split the path.
-
Click the Cut path at selected anchor points () icon in the Control panel.
If the path is split at an anchor point, a new anchor point will appear above it, and one of these points will be selected.
-
Use the Direct Selection tool () to modify a new anchor point or path segment.
Tools for cutting and separating objects
Scissors
Example: Scissors tool The scissors tool allows you to split a path, graphics frame, or empty text frame at an anchor point or segment.
-
Press and hold the Eraser tool () to display and select the Scissors tool ().
-
Click on the contour at the point where you want to split it. Splitting the path will create two anchor points. One anchor point is selected by default.
If you don't click on a point or path with the Scissors tool selected, Illustrator will prompt you to apply the tool to the path's segment or anchor point. Click OK to continue.
-
Use the Direct Selection Tool () to select a previously cut anchor point or path to modify the object.
The Knife tool cuts objects along a freehand path with the tool, separating the objects into separate, filled slices (a slice is an area not separated by a line segment).
-
Press and hold the Eraser tool () to display and select the Knife tool ().
-
Do one of the following:
- To cut along a curved line, drag over the object.
- To cut an object in a straight line, hold down the Alt (Windows) or Option (macOS) key while dragging the cursor over the object.
Cuts made with the Knife tool are indicated by a dotted line on the object.
- To cut along a curved line, drag over the object.
-
Choose Selection > Deselect.
When cutting, Illustrator chooses the object by default.
-
Use the Direct Selection Tool () to drag each part.
Clipping objects with clipping masks
Example: Clipping Objects with Clipping MasksClipping masks allow you to use an object to hide parts of other objects. See Clipping Masks for details.
-
Create an object to be used as a mask. This object is called a clipping path. Only vector objects can be used as clipping paths.
-
Move the clipping path over the objects to be masked, in order of overlap.
-
Select the clipping path and objects to be masked.
-
Choose Object > Clipping Mask > Make.
To create a clipping path from an area where two or more objects overlap, you must first group the objects.
Trimming objects with Pathfinder effects
Pathfinder effects provide various ways to separate and trim overlapping objects.
Trimming objects using component interaction modes in the Pathfinder panelA. Add to a shape using Connect mode B. Remove from a shape using Minus Top C. Intersect with a shape using Intersect mode D. Exclude area of intersection of shapes using "Exclude"
-
Use the Selection tool () to select the objects you want to crop.
-
Choose Window > Pathfinder.
-
In the Pathfinder panel, select Component Interactions and Pathfinder Effects. For more information, see Pathfinder Effects.
Related Resources
- How to Quickly Join or Trim Paths
- Tool gallery
- Select objects
- Combining objects
- Edit contours
- Image cropping
- Clipping masks
- Fragments and image cards
Contact us
We'd love to hear from you. Share your thoughts with the Adobe Illustrator community.
Account login
To come in
Account Management
Crop Photo Online Free - Contour & Circle |Watermarkly
To get started, you need to drag and drop the photo into the application or click on "Select Images" , after which a pop-up window with a choice will appear. You can upload photos from your computer, Google Drive, Google Photos or DropBox.
Watermarkly supports image formats such as JPG , JPEG , PNG , HEIC , WEBP , GIF , B There are no restrictions on the size of uploaded photos, except for the amount of free memory on your computer or phone.
If you select "From my computer" , you need to find the desired folder in the window that opens and select the images you want to crop. To select all photos in a folder, press Ctrl+A on Windows or Cmd+A on Mac.
If you select one of the following - "with Google Drive" , "with Google Photos" or "with DropBox" - you will see a window where the application will ask you to access your online storage. You should click on "Allow access" . This will open a new window for selecting images. If you want to select multiple photos, click on them while holding down the Shift key. Then press the key "Select" .
If you want to add more photos, click on "Add photo" . If you want to delete all photos from the application and upload others, you should click on "Clear" .
To adjust the crop area, use the "Desired size or aspect ratio" drop-down list located at the top of the page. Click on it. The following ratio options are available to you.
Crop shape selection
With our application, you are not limited in cropping possibilities. You can crop your photo in a circle, rectangle or square. To start image processing, you need to select one of the forms: “Rectangle” – can be easily transformed into a square – or “Round” .
Regardless of which shape you choose, the crop area can be adjusted manually : increase or decrease the radius, width or height. To do this, just move the blue frame using the cursor on a computer or with your finger on a mobile device. In this case, you can set any boundaries you want.
If you have chosen a rectangle, the height and width can be changed separately from each other, if a circle - you change only the radius.
Alternatively, you can click in the selection box and enter a specific crop size in pixels . If you enter 1000 for the round cropping option, your processed photos will be cropped in a circle with a diameter of 1000 pixels. If you specified 1000 for a "rectangle", then in this way you set the width of the cropped images, while the height will be selected automatically based on the cropping shape.
You can also specify the width and height at once in the input field (for example, 1200 × 1900). In this case, the resulting photos will have a size of 1200 × 1900 pixels.
If you just want to move the blue frame to another location on the photo without changing its size, click inside the crop and move it.
Previously used cropping options
The Watermarkly application saves the processing history of your photos . This greatly simplifies and speeds up the cropping process if you regularly use the same cropping options.
If you are not using the program for the first time, you will see the previously selected settings in the drop-down list of proportions under the choice of basic shapes.
Standard aspect ratio
This is the set aspect ratio of the crop area.
In this case, the absolute size of the sides in pixels is not taken into account, but only the ratio of width to height . To your choice of ratio: 1:1, 3:2, 4:3, 16:9, 2:3, 3:1, 2:1, 1:2. If you are interested in a proportion that is not listed, you can specify your ratio directly in the selection field, entering, for example, 4:5.
You can also resize the crop area up or down, or move the crop area to any other location in the image. In this case, the set aspect ratio will be preserved.
When uploading multiple photos, you can set one cropping option for all images or different ratios for each photo individually.
Proportions for social networks
This sample contains the most popular proportions for social networks such as Instagram , Facebook , Twitter , Youtube , LinkedIn 9094 .
In contrast to the standard proportions, here not only the ratio of width to height is taken into account, but also the specific size in pixels. The same size will be taken into account when saving cropped photos. For example, if you chose the proportion of Instagram Stories Story 1080 × 1920, the cropped photo saved will be 1080 pixels wide and 1920 pixels high.
In this case, you can also change the size of the crop zone manually by specifying your width and height in pixels. For example, you can enter 1200 × 1900.
Horizon Adjustment
On the right side of the aspect ratio selection you will see a blue slider that will allow to adjust the angle of the image.
It is initially set to the 0° position. Depending on which direction you want to tilt the photo, the tilt indicator can be changed from -7° to 7° by moving the blue circle to the left or right.
Output Settings
After you have finished adjusting the crop area and made all the changes, click on Crop Photo . You will see Output Settings.